In Sorting Soil – Rocks and Minerals, we talked about the composition of soil. Then, in Base and Sector Mapping we explored mapping the natural and human made features of a site. Here, we explore topography, the vertical shape of the land where we live and travel, and how topographical maps represent elevation.
What is Topography?
Earth’s dynamic processes have shaped its surface into hills, mountains, canyons, valleys, plateaus, peaks, basins, ravines and other forms. We can describe all of these land forms in terms of changes in elevation. For example, a mountain is a large landform with a peak surrounded by relatively steep slopes (i.e., rapidly changing elevation). Hikers, gardeners, geologist and geographers call the size, shape, and arrangement of the landforms and other natural and human-made features the topography of an area.
Not only large areas with massive landforms have a typography. In addition, your own yard has one! Trail designers use typography to determine how to lay out hiking trails. And, landscapers and gardeners use typography to determine where to plant various kinds of plants. We also change the typography of our sites by creating berms (i.e., mounded soil) and swales (i.e., shallow trenches) to control the flow of water on our yards.
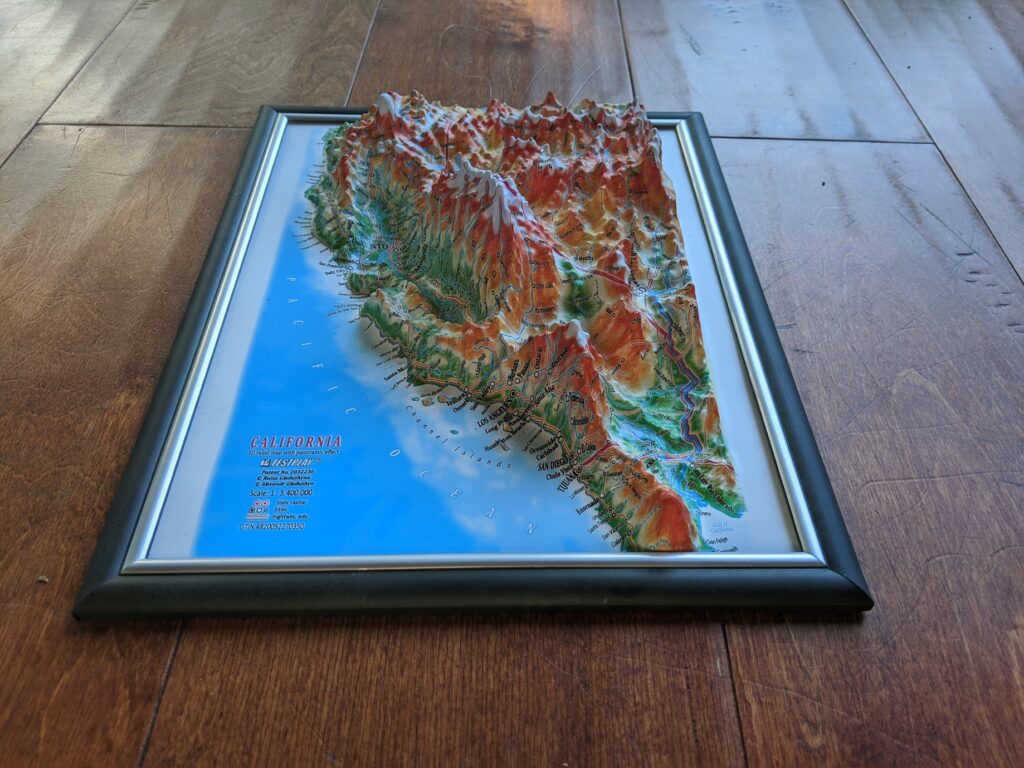
Three dimensional models called raised-relief maps like the one pictured at the top of this post are the clearest way to represent the topography of an area. And contour lines are the most accurate two-dimensional way to represent the topography of an area. A contour line shows all of the points at the same elevation in an area. A two-dimensional map that shows the typography of an area with contour lines and/or shading is called a topographical or topo map.
Finding and Drawing Contours
First, find a spot in your yard where you think water will form a puddle. Look for a low spot with higher points all around it. If you can’t find a place where a puddle will naturally form, dig an irregularly shaped indentation in the soil. Next, use a hose or bucket to make a puddle. Now draw a picture of the edge of your puddle. You’ve just drawn your first contour line! Your contour line shows all the points at the same level around your puddle. Because water is a liquid and because liquids find their own level under the force of gravity, water can be used to find contours!
Now pick another spot in your yard. Put a rock, stick or another marker to mark your spot. Next, take a step away from that spot to another spot that is at the same elevation (not up or down hill, but at the same level). Then, put a rock, stick or another marker to mark that spot. Repeat this process until you have marked 5 spots. Now draw a map that shows those 5 spots and connect the dots with a line. You’ve just drawn your second contour line.
What’s Next
In this activity, you gained a little experience using contour lines. In later activities you’ll learn how to use contour maps to know where level and steep parts of hikes will be. You’ll also learn how to use knowledge of the contours of your yard to plan on and off contour berms and swales! For now, if you want a little preview of a typo map of the area where I live, click here.