Microbes, those invisible creatures we need a microscope to see, get a bad rap in general and are even more unpopular during our current pandemic. Indeed, I have little positive to say about viruses! But their equally maligned microbial buddies, the bacteria include many species that benefit humans in many different ways (e.g., beneficial gut and soil bacteria along with those responsible for fermenting yogurt, pickles, sauerkraut and kombucha leap to mind). Yeasts, another type of microbe also benefit us in many ways (e.g., making bread, bear and wine).
In this activity I will guide you and your family through the multi-day process of cultivating wild yeast and the lactic acid producing lactobacillus bacteria to produce a working sourdough starter. This activity provides many opportunities for younger children to use their senses to observe and use their words to describe what they observe. It also provides opportunities for older children to do the same and to think and learn about big ideas like the notion that no thing comes from nothing and no thing disappears, mater just changes form. I’ve used this activity with even older children (upper elementary age though middle school) to teach about the chemical summary formulas for yeast fermentation using ball and stick chemical modeling kits and the benefits of lactic acid in delaying the spoiling of food. It also provides a good context for doing a lot of measuring and counting and countless other learnings.
To engage in this activity, you’ll need dechlorinated water and about a cup of flour; dechlorinated water because chlorine will kill the very microorganisms we’re trying to cultivate and organic whole wheat flour best because it contains the greatest variety of nutrients our microbes will feed on and because it is not treated with chemicals that may have killed of any wild yeast or bacteria in the flour. You can dechlorinate your tap water by just leaving a cup of tap water out for 24 hours. You will also need a glass jar or plastic container with about a four-cup capacity. A kitchen scale that measures grams would helpful but is not required.
- Mix 20 grams (or 2 level teaspoons) of dechlorinated lukewarm water and 20 grams (or 2 rounded teaspoons) of flour together in your loosely covered container and mark the level on the container or on a piece of tape on the container.
- Store in a warm dark place for 1-3 days. I put mine on top of our refrigerator. The inside of your oven is a good place as long as you remember to take it out when using the oven.
- Check your starter regularly and when it has tiny bubbles on its surface (filled with carbon dioxide, a product of yeast fermentation) and a nice nutty smell add 40g of water (4 level teaspoon) and 40 grams of flour (4 rounded teaspoons) and again, mark its level on the side of the container.
- Wait one day checking your starter regularly. It may rise and fall and that’s OK. At this point add 80g of water (8 level teaspoons) and 80 grams of flour (8 rounded teaspoons).
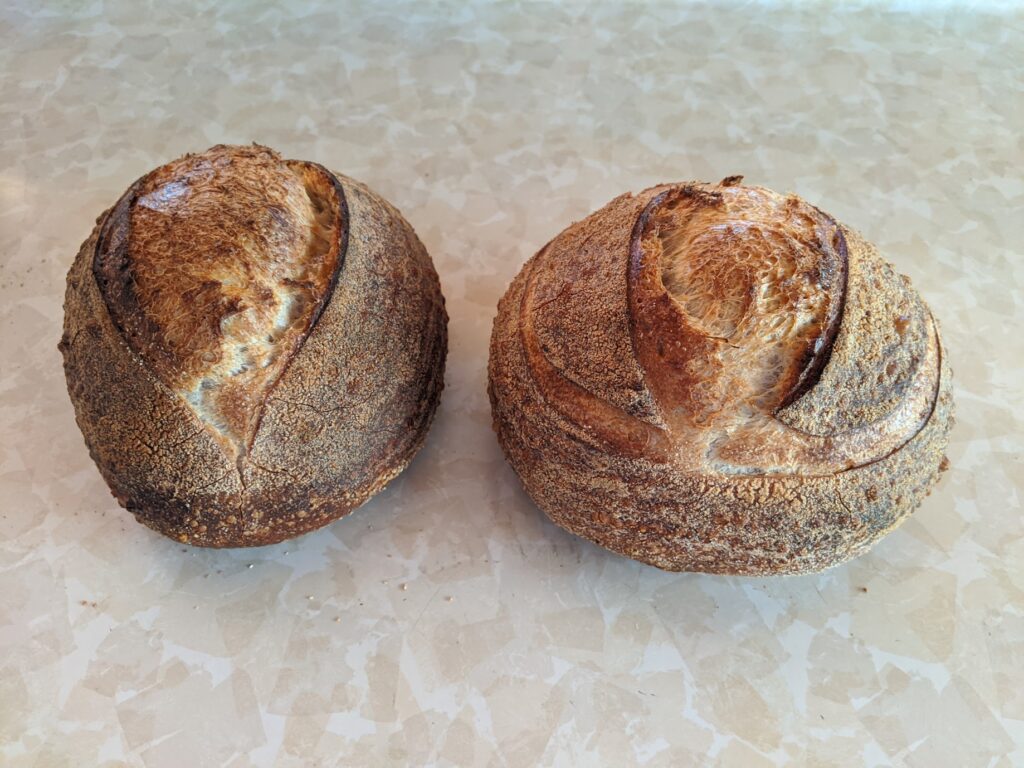
- At this point your starter should have risen a lot and should be full of air bubbles and should smell good, maybe a little sour but certainly not rotten. You’ve done it! Now your starter needs a name. I call mine Gen, short for Genesis. The next steps involve stabilizing your starter and getting into the routine of keeping your ecosystem in a jar alive and well.
Here’s a link to a video of my favorite chef (he’s adorable) talking more about the background behind sourdough starter, demonstrating the process and talking about what to do with your starter once you’ve got it going (I’ll talk about that in a later lesson).
Video of the French Guy Making Starter
As always, please ask any questions and share your experiences below.